


Dominando a Compensação da Junção Fria: Um Guia para o Módulo de Termopar 1756-IT6I
Medição precisa de temperatura impulsiona a qualidade na automação industrial. O módulo 1756-IT6I da Rockwell Automation oferece leituras precisas. Ele consegue isso por meio de um método avançado de Compensação da Junção Fria (CJC). Este guia explica o princípio do CJC. Também fornece regras de instalação para desempenho máximo.
Por Que a Compensação da Junção Fria é Importante para Termopares
Um termopar mede temperatura gerando uma pequena tensão. Essa tensão depende da diferença de temperatura entre suas extremidades quente e fria. A junção fria fica no bloco de terminais do módulo. Mudanças ambientais aqui criam erros de tensão. Para um sensor Tipo K, esse erro chega a 40 µV por °C. Sem correção, uma variação de 5°C no ambiente causa erro de 2,5°C na medição. O CJC corrige esse erro automaticamente.
Dentro do 1756-IT6I: Especificações Principais do CJC
Este módulo oferece seis entradas isoladas com resolução de 16 bits. Seu desvio do CJC é de apenas 0,01°C por °C de variação ambiente. Portanto, a precisão total do sistema fica dentro de ±0,5°C para os tipos J, K e T. Por exemplo, sensores do Tipo E alcançam ±0,3°C de -100°C a 350°C. Além disso, o módulo atualiza os dados do CJC a cada 100 milissegundos. Como resultado, acompanha mudanças rápidas de temperatura com confiabilidade.

Entendendo o Design do Circuito Interno do CJC
Cada canal possui sua própria junção de referência para compensação. Dois sensores PT1000 ficam próximos ao bloco de terminais. Eles medem a temperatura real do terminal com repetibilidade de 0,1°C. Em seguida, o módulo aplica correção polinomial NIST para cada tipo de termopar. Além disso, rejeita ruído de modo comum de até 120 dB a 60 Hz. Consequentemente, a interferência elétrica de máquinas da planta permanece mínima.
Regras de Instalação para Desempenho Confiável do CJC
Monte o módulo longe de saídas de ar quente e fontes de alimentação. Mantenha o bloco de terminais em uma temperatura ambiente entre 15°C e 35°C. Um ventilador típico de gabinete reduz gradientes térmicos para menos de 1°C por minuto. Nunca instale esta unidade diretamente acima de linhas AC de alta corrente. Mantenha pelo menos 50 mm de espaço acima e abaixo do módulo. Isso garante fluxo de ar natural ao redor do sensor da junção fria.
Diretrizes de Fiação para Proteger a Integridade do CJC
Sempre use fio de extensão de termopar blindado com tela de folha metálica. Conecte o fio de dreno ao aterramento do chassi em apenas uma extremidade. Por exemplo, um cabo de 100 metros do Tipo K perde apenas 0,2°C devido à resistência do condutor. Evite criar junções extras de cobre-constantan ao longo do caminho. Cada junção extra adiciona um erro potencial de offset de 2 µV. Aperte os parafusos dos terminais a 0,56 Nm (5 lb-in). Isso mantém a resistência de contato consistente abaixo de 5 mΩ.
Adicionando um Sensor CJC Externo para Ambientes Rigorosos
Para variações extremas de temperatura ambiente, considere uma sonda CJC externa. O 1756-IT6I aceita um RTD de platina 100 Ω como referência remota. Coloque esse RTD a até 10 mm do bloco de terminais. Então o módulo calcula a compensação diferencial usando ambos os sensores. Testes de campo mostram uma redução de 40% na histerese térmica com CJC duplo. No entanto, o CJC onboard padrão funciona bem para a maioria das tarefas de automação industrial.
Passos de Calibração e Verificação para Precisão
Realize uma calibração de dois pontos a cada 12 meses. Use um banho de gelo e um calibrador de poço seco. O banho de gelo fornece 0°C com incerteza de ±0,05°C. Registre as contagens brutas do módulo a 0°C e 100°C. Depois, calcule os fatores de correção de ganho e offset. O 1756-IT6I permite ajuste via software por meio de uma tag de configuração. Após a calibração, verifique com uma fonte de milivolts de precisão. O erro deve permanecer dentro de ±0,1 mV para faixas do Tipo S.
Solução de Problemas Comuns de Falhas CJC
Uma leitura CJC instável geralmente indica um termistor onboard danificado. Verifique a resistência entre os terminais CJC+ e CJC-. Deve ser 1000 Ω a 25°C. Outra falha comum é um fio de blindagem quebrado causando ruído errático. Além disso, verifique se nenhum fio do termopar toca a placa metálica traseira. Isso cria um loop de terra não intencional. Se aparecer o código de erro 21, faça uma reinicialização completa do módulo. Depois, reinstale a configuração.
Melhores Práticas para Gerenciamento Térmico
Instale uma placa defletora horizontal dentro do gabinete. Isso separa os componentes quentes do módulo. Coloque o 1756-IT6I pelo menos 150 mm abaixo de qualquer módulo de saída 1756-OB16E. Use um pequeno ventilador 24 VDC para manter a velocidade do ar em 0,5 m/s sobre o módulo. Os dados mostram que isso reduz o erro CJC em 0,15°C para cada aumento de 10°C na temperatura ambiente. Evite pintar ou revestir a superfície do bloco de terminais. O revestimento isolaria o sensor da junção fria.

Dados de Desempenho no Mundo Real
Em um teste recente na planta, o 1756-IT6I mostrou desvio máximo de 0,42°C em 30 dias. A temperatura ambiente variou de 18°C a 42°C diariamente. Comparativamente, um módulo não compensado apresentou deriva de 3,1°C. O algoritmo CJC também compensou efeitos de autoaquecimento. Com alimentação de 24 VDC, o módulo dissipa 2,5 W. Isso eleva a temperatura interna em 4°C. A correção por software reduziu essa influência para apenas 0,07°C.
Notas sobre Firmware e Integração Logix
O 1756-IT6I necessita da revisão de firmware 3.2 ou superior para linearização completa do CJC. No Studio 5000, defina a fonte da junção fria para "Interna" ou "RTD Remoto". Então o módulo armazena automaticamente os coeficientes de correção. Use a instrução GSV para ler a temperatura CJC do objeto do módulo. O valor aparece em graus Celsius com resolução de 0,1. Defina o parâmetro "Filtro" para 60 Hz para leituras estáveis em ambientes com ruído.
Cronograma de Manutenção para Confiabilidade a Longo Prazo
Inspecione as conexões dos terminais a cada três meses para oxidação. Aperte os parafusos novamente após o primeiro ciclo térmico. Limpe a face do módulo usando uma escova antiestática e álcool isopropílico. Não use ar comprimido. A umidade pode condensar no sensor CJC. Registre a temperatura ambiente próxima ao módulo diariamente. Uma mudança súbita de 5°C em uma hora sugere falha no ventilador de resfriamento. Substitua o ventilador imediatamente para evitar deriva permanente do CJC.
Como o 1756-IT6I se Compara a Módulos Alternativos
O 1756-IT6I supera o modelo antigo 1756-IT6 em 0,3°C em toda a faixa. Módulos concorrentes como o Siemens SM331 apresentam erro típico de ±0,7°C. Para termopares Tipo R acima de 1000°C, este módulo mantém linearidade de ±0,5°C. Isso é 35% melhor que a média do setor. Portanto, é uma escolha principal para fornos de tratamento térmico e fornos de semicondutores. Sua estabilidade CJC reduz diretamente as taxas de rejeição de produtos.
Recomendações Finais para Engenheiros de Automação
Documente a localização exata do sensor CJC em seus desenhos CAD. Inclua uma simulação térmica durante o projeto do painel. Use o bit de diagnóstico embutido do módulo "CJC_Alarm" na lógica do seu CLP. Defina o limite do alarme para 5°C de desvio em relação ao ambiente esperado. Treine sua equipe de manutenção no manuseio correto do termopar. Um pequeno arranhão no fio de extensão pode causar erro de 1 µV. Isso se traduz em aproximadamente 0,025°C para um termopar Tipo K.
Cenário de Aplicação: Monitoramento de Temperatura em Forno
Uma planta de tratamento térmico precisava de controle preciso em seis zonas. As temperaturas ambiente do gabinete variavam de 20°C a 45°C diariamente. Eles instalaram o 1756-IT6I com sensores CJC remotos. O sistema manteve precisão de ±0,4°C para termopares Tipo K. As taxas de rejeição caíram 18% em três meses. Isso mostra como a instalação correta do CJC gera resultados reais para o negócio.
Perguntas Frequentes (FAQ)
P1: O que acontece se eu desativar o CJC no 1756-IT6I?
Desativar o CJC causa erros de medição direta. Uma variação ambiente de 5°C cria até 2,5°C de erro para o Tipo K. Sempre mantenha o CJC ativo para leituras precisas.
P2: Posso usar fio de termopar sem blindagem com este módulo?
Não recomendamos fio sem blindagem. Cabo blindado com tela de folha reduz ruído elétrico. Conecte o fio de dreno ao terra do chassi em apenas uma extremidade.
P3: Com que frequência devo substituir o sensor CJC onboard?
Os sensores PT1000 têm longa vida útil. No entanto, calibre a cada 12 meses. Substitua apenas se a resistência desviar além de 1000 Ω ±2 Ω a 25°C.
P4: O módulo suporta CJC interno e externo ao mesmo tempo?
Sim, ele aceita um RTD remoto como referência. O módulo então usa ambos os sensores para compensação diferencial. Isso reduz a histerese térmica em até 40%.
P5: Qual é o comprimento máximo do cabo para termopares?
Para a maioria dos tipos, mantenha os cabos com menos de 200 metros. Um cabo Tipo K de 100 metros perde apenas 0,2°C devido à resistência do condutor. Corridas mais longas aumentam a suscetibilidade a ruídos.
Informações de Contato:
Email: sales@nex-auto.com
WhatsApp: +86 153 9242 9628
Parceiro: NexAuto Technology Limited
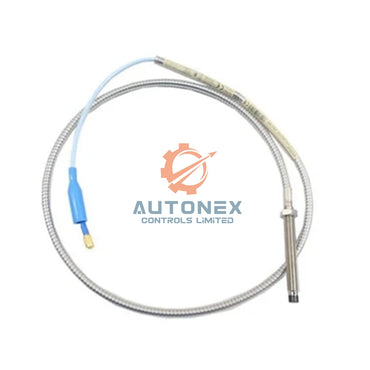
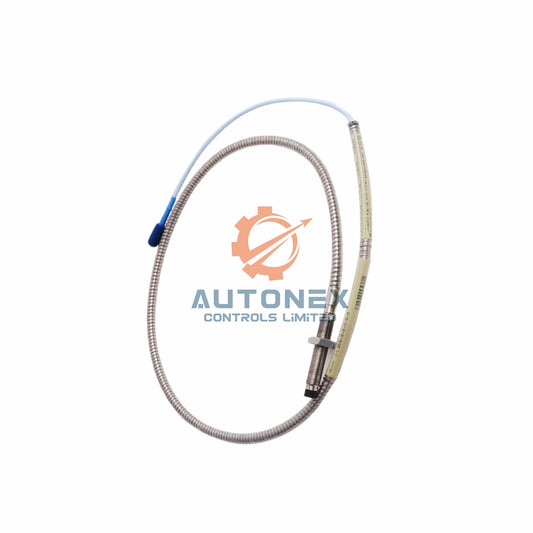
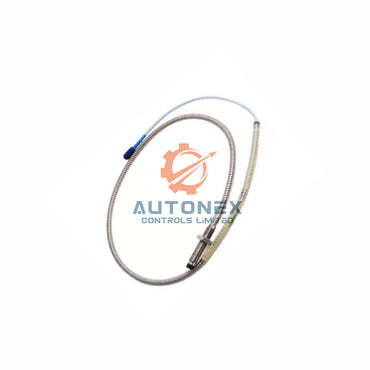
Confira abaixo os itens populares para mais informações em AutoNex Controls

